
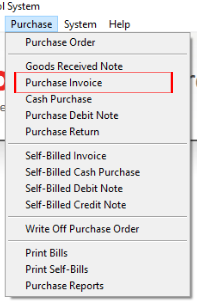
Step 1: Open Purchase Invoice
Navigate to System > Purchase Invoice.
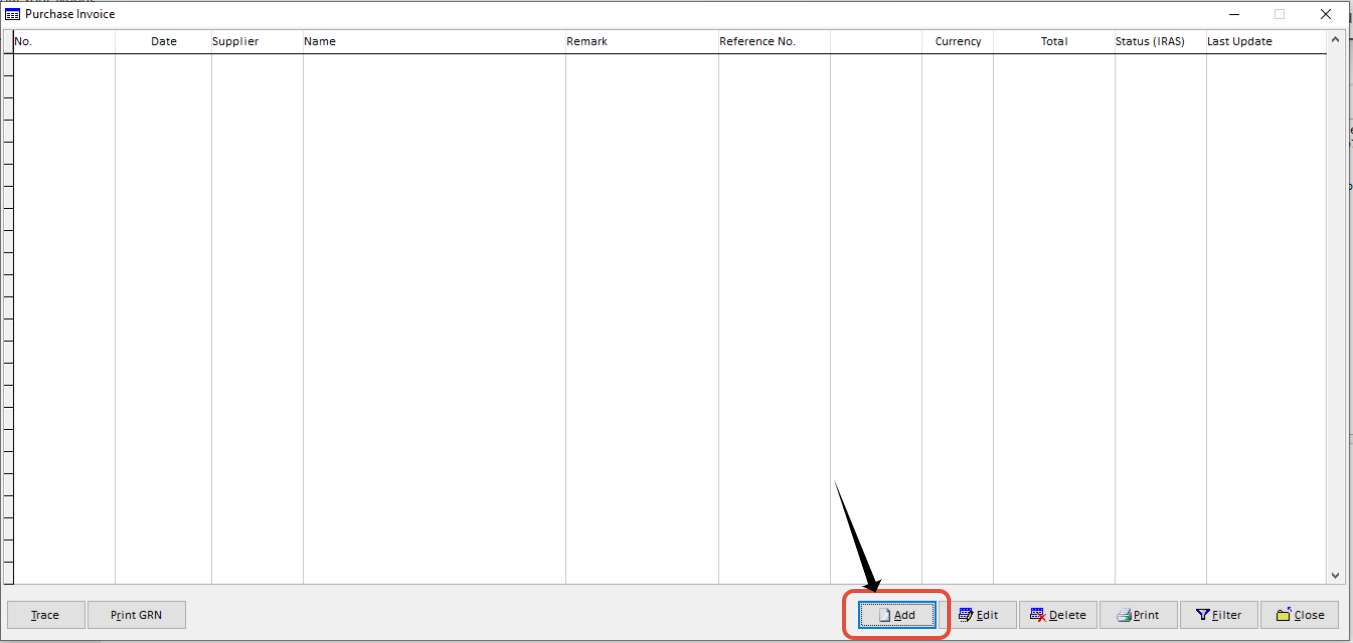
Step 2: Add a New Purchase Invoice
Click Add to create a new Purchase Invoice.
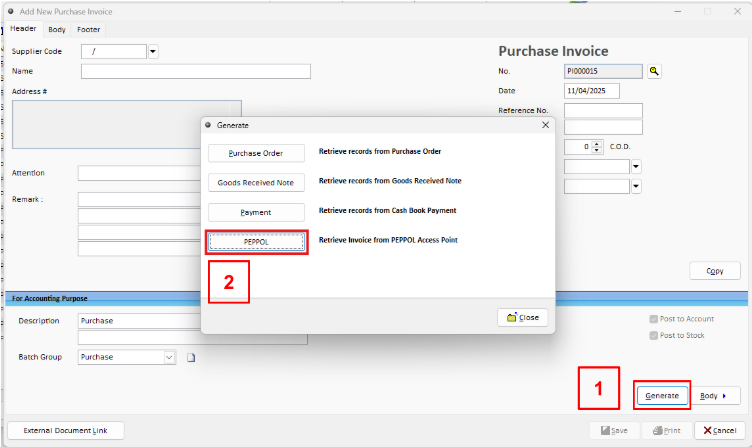
Step 3: Retrieve Invoices from Peppol
Click Generate and select Peppol to retrieve incoming supplier invoices from the Peppol network. This function is available for users to update and synchronize Peppol invoices from Datapost as necessary.
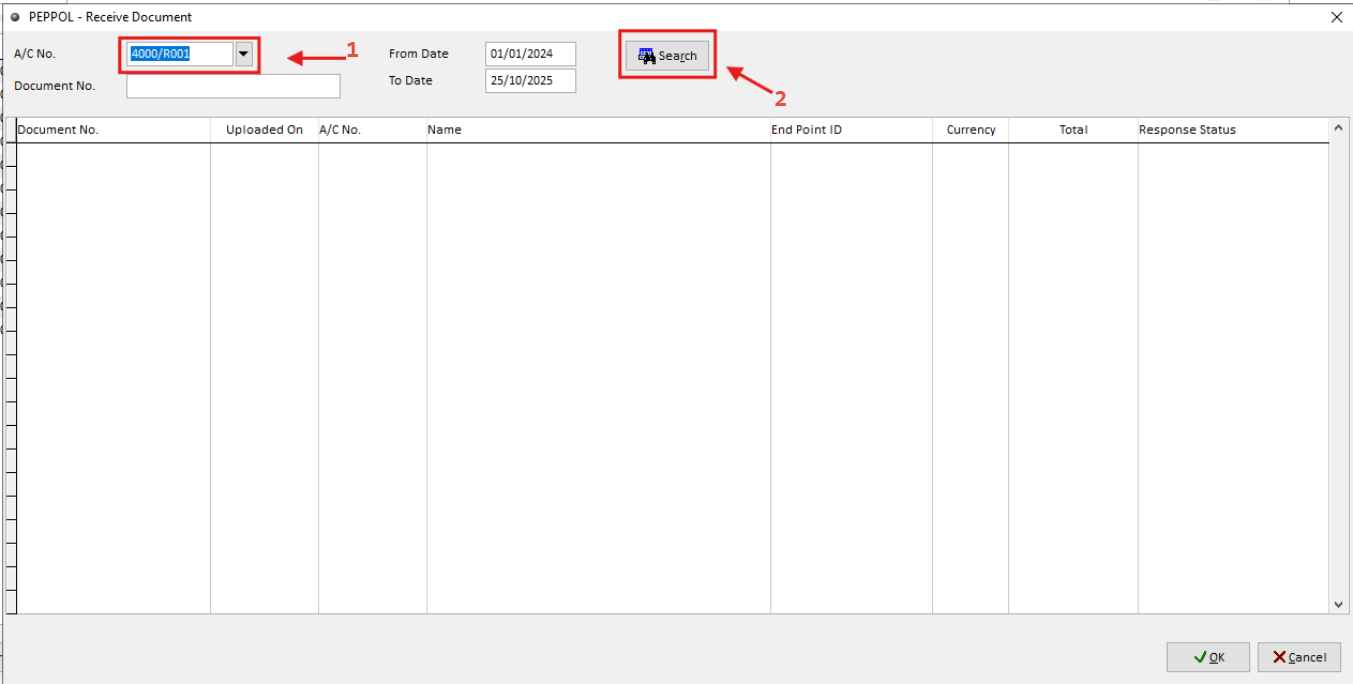
Step 4: Search for Creditor Invoices
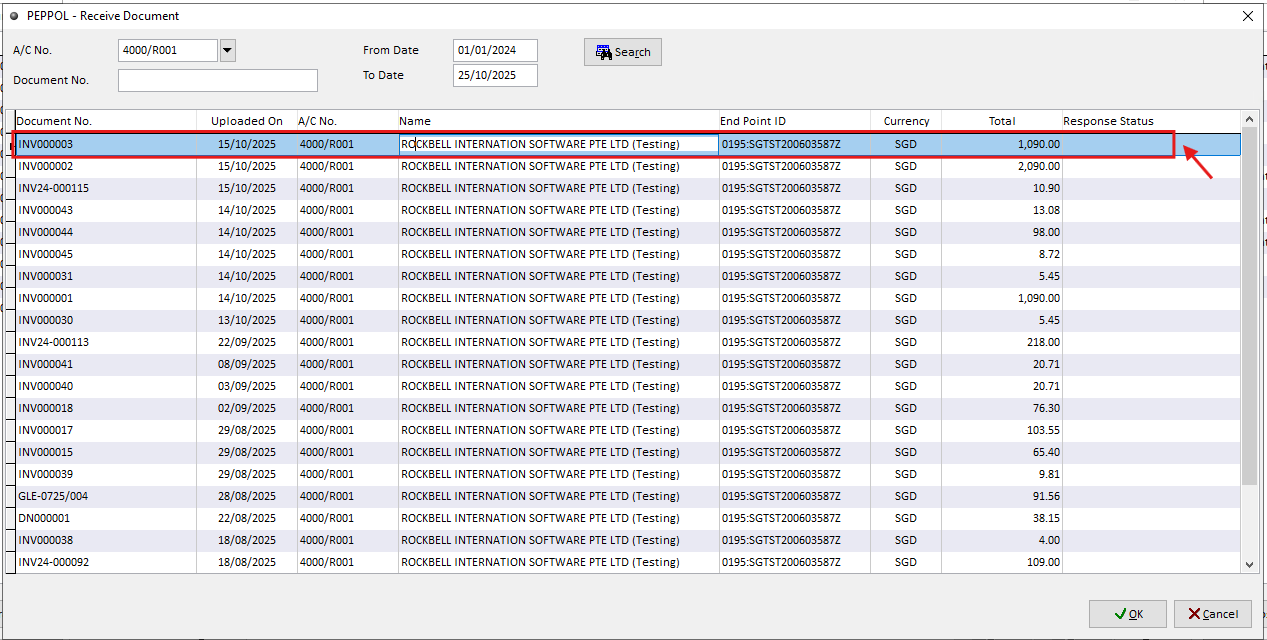
Select the creditor (supplier) under A/C No., then click Search. The system will display the available invoices for the selected supplier.
Step 5: Select the Supplier Invoice
Select the required invoice from the list and click OK. The system will automatically fill in
the Purchase Invoice with the retrieved invoice details.
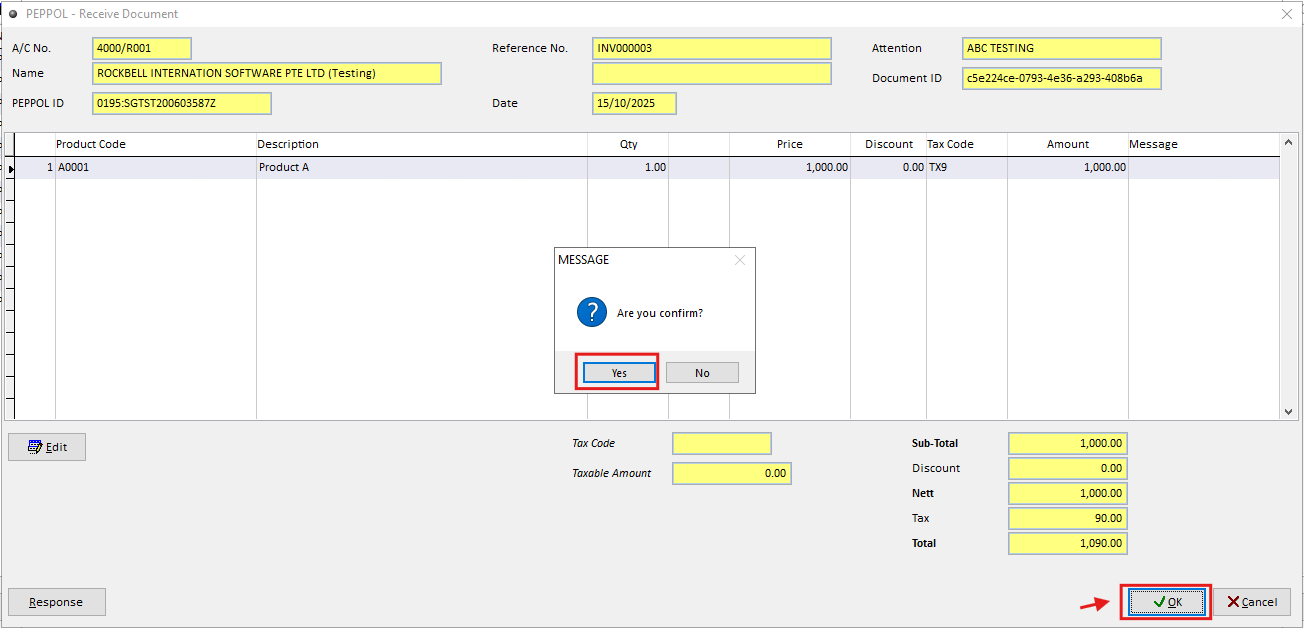
Step 6: Confirm the Purchase Invoice
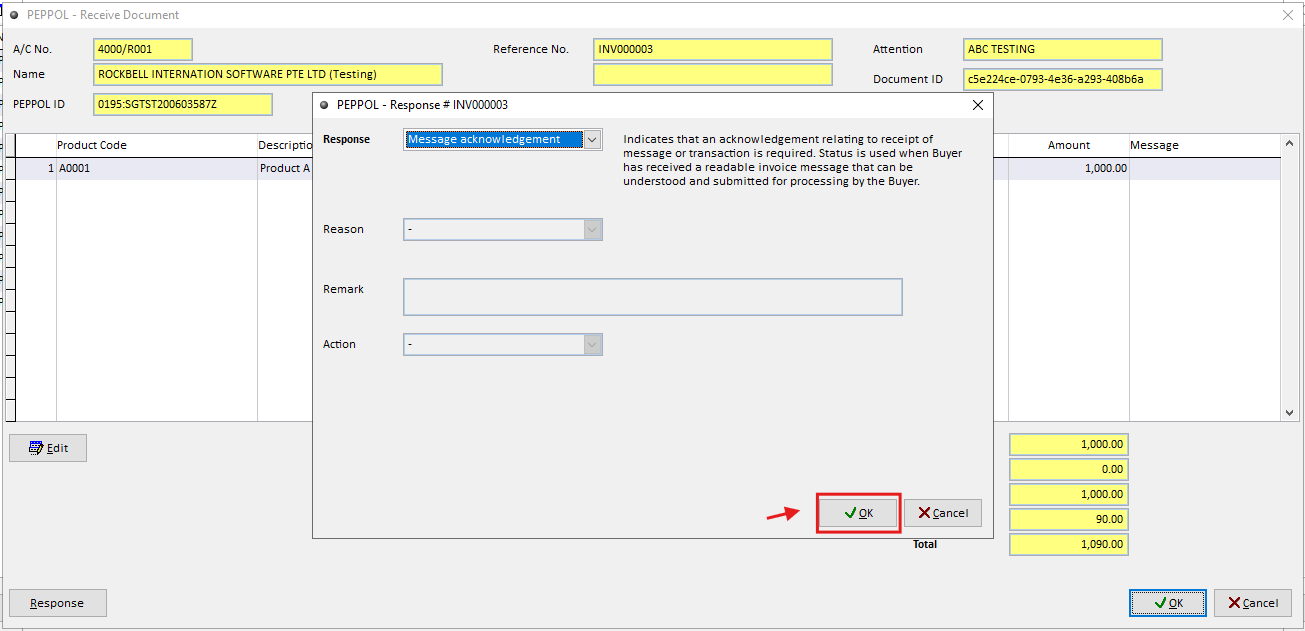
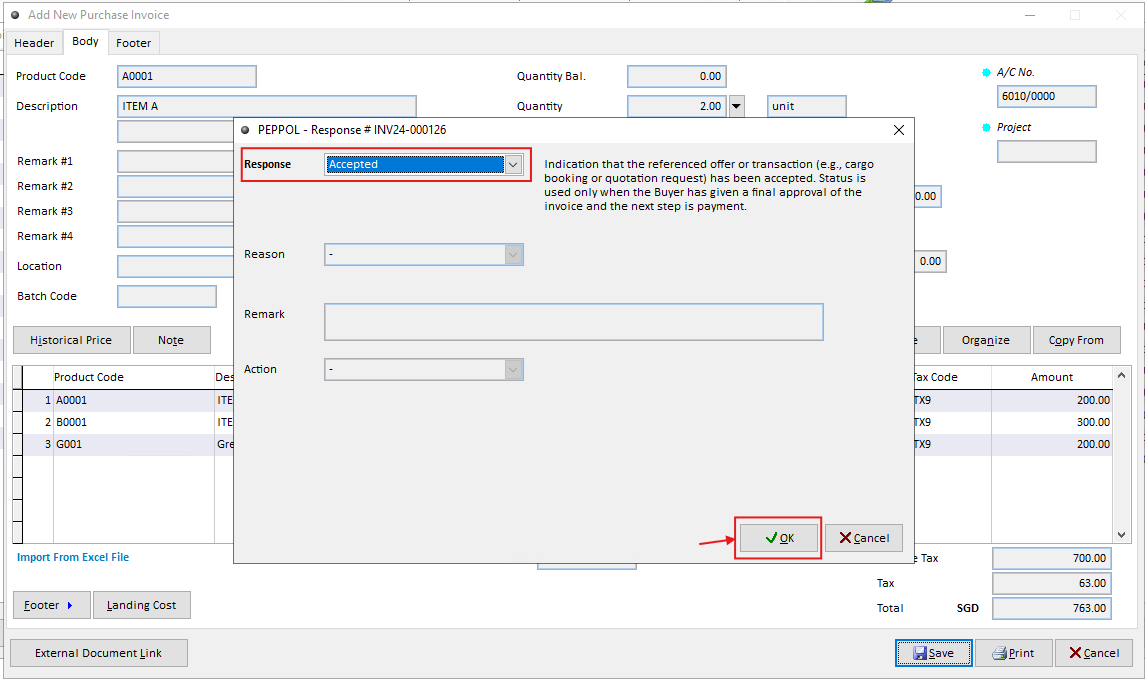
Review the retrieved invoice information and click OK to confirm. Select the appropriate Response, then click OK to continue processing the Purchase Invoice.
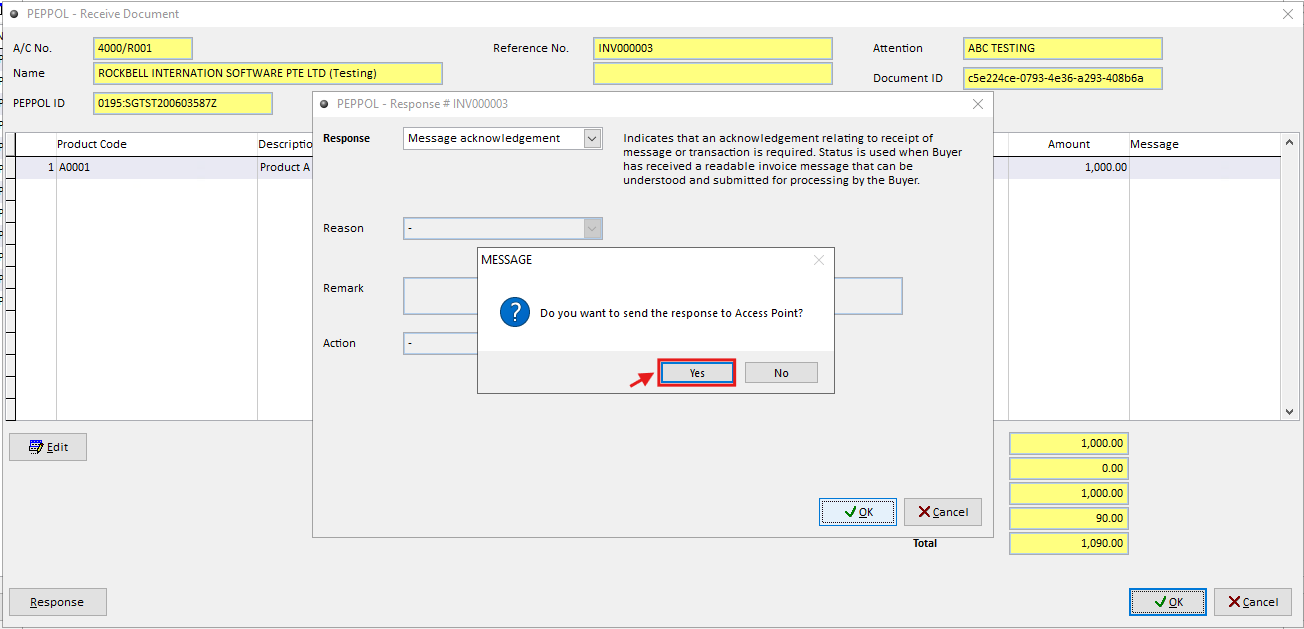
Step 7: Save/Print and Submit the Invoice
After clicking Save or Print, the system will display a prompt whether to send the e-invoice to IRAS.
“Do you want to send the transaction to Access Point?”
Select Yes → The document will be transmitted automatically.
Select No → The document will not be transmitted immediately and can be submitted later through Document Management.
Step 8: Review and Map Product Details
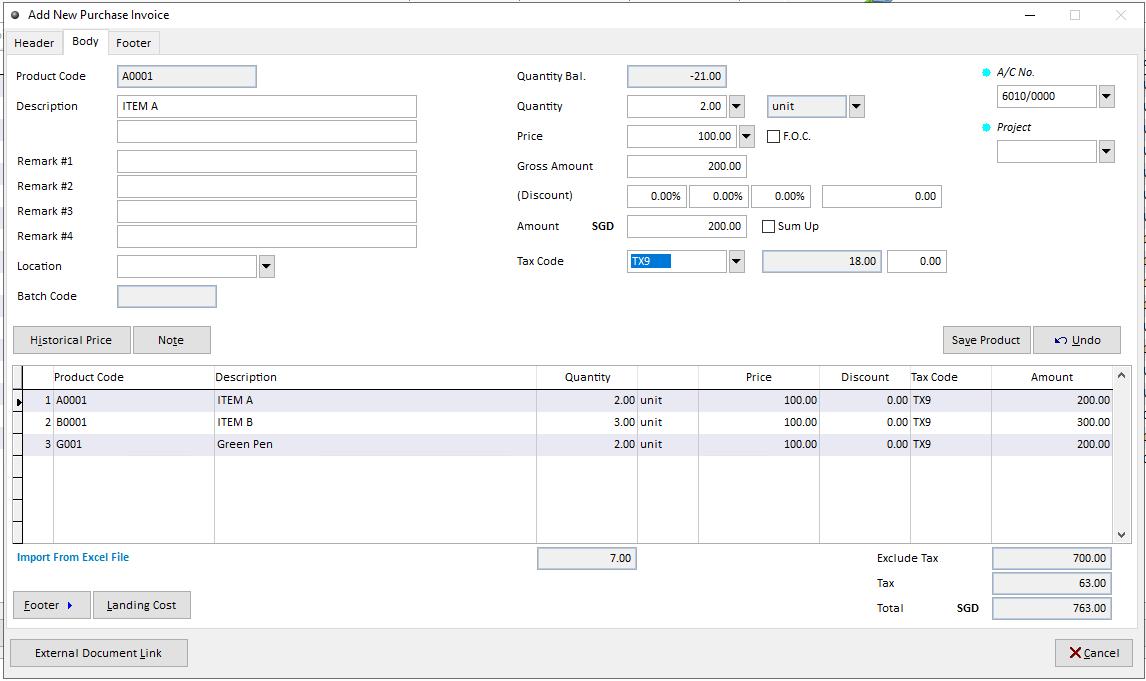
The transaction will be downloaded into Purchase Invoice.
If necessary, click Edit Product to:
Modify the product description
Adjust the GST Tax Code
Ensure the product details are correctly mapped to the Million System
Step 9: Save the Purchase Invoice
Review the Purchase Invoice and click Save to complete the process. The system will respond and return the relevant information accordingly
Note: You may also manually create a Purchase Invoice or Purchase Return if required.